How to Migrate WordPress Multisite Subdomain to a Single Site
WordPress Multisite is a platform usually used by corporate houses, institutions or philanthropic organization, whose organization is spread across length and breadth of a country. They usually give prominence to each of the regional headquarters and manage them through the WordPress Multisite Subdomain in a form of subsites.
What is a WordPress Multisite?
Multisite is a big network of individual sites, where a number of independent sites join together in a form of group. They work from a single platform.
The WordPress multisite may have one main domain and multiple sub-domains or directories where individual sites are hosted.
In a multisite network, subsites are either individually controlled from the Admin Control panel or all the subsites are combined together to be controlled from the Network control panel.
Why migrate a WordPress Multisite Subdomain?
During the management and control of multi-sites, a time comes, when a need arises to segregate the sub-domains or subsites from the multisite and move some of them to a single site of another host.
There may be several reasons for doing so. some of them are as follows.
- The subsite may outgrow the network in terms of posts comparing to other subsites.
- The subsite may outgrow other sub sites in terms of volume of traffic.
- SEO considerations of the multisite may force it to split.
Migrating WordPress Multisite Subdomain to a Single Site is an event which occurs rarely in a bloggers life. So all the bloggers are not confident in performing such tasks.
However, if you go through the process once, there is hardly anything to panic and you will gain tremendous confidence to perform the task if you are called to do so the next time.
In the following paragraphs, I am going to deliberate the subject step by step so that it is easy to understand and easy to comply.
The process of migrating WordPress Multisite Subdomain to a Single Site can be performed in three modes. The automatic mode, auto-manual mode and by manual mode. All these modes are explained below in detail.
Before you do anything, first take the backup of the whole multisite. Remember precautionary measures are of paramount importance to restore the sites, in case some untoward incident.
Moving WordPress Multisite Subdomain in Automatic Mode
Migrating a WordPress Multisite Subdomain to a subsite of a different host in an automatic mode is possible through only plugins.
A normally paid version of these plugins allows you to perform the task. In this series Duplicator, Backup Guard, WP Migrate DB Pro, and Backbuddy plugins are some of the plugins who are known to accomplish the task of migrating subsites from a multisite platform very conveniently without much intervention of the blogger.
They do it all in an automatic mode.
Moving WordPress Multisite Subdomain in Auto-manual Mode
Auto-manual mode of migration of WordPress Multisite Subdomain, involves some of the task to be done manually, whereas rest all is done automatically.
You can perform the migration in this mode simply following the under mentioned steps.
Auto-manual mode migration
1. Go to the subsite pane of the multisite, which you want to migrate.
2. Go to Tools > Export option.
3. Check All content option on the Export panel.
4. Save all the contents of the subsite in an XML file on your Desktop.
5. Now go to the new host site and install WordPress. You can take help of article how to install WordPress.
6. After installation of WordPress, we must install desired plugins.
7. You can now bring back contents of your WordPress Multisite Subdomain to the new site of the different host by using the Import option.
8. You can import by using Tools > Import option and migrate the contents which were saved on the desktop in XML format.
9. You must check on the ‘Import Attachment Option’, during the Import procedure. It may take little in moving all the contents and media etc. so be patient.
10. After the transfer of contents from the old WordPress Multisite Subdomain to the new subsite is over, you should set the permalink.
11. Go to Settings > Permalinks option and set it similar to your old site.
12. Now set the Redirection option, so that if a visitor reaches your old site, he will be redirected to the new site. You can do it by going to the .htaccess file of your old multisite and adding the following code to it.
Options +FollowSymLinks
RewriteEngine on
RewriteCond %{HTTP_HOST} ^subdomain\.OldDomain\.com$ [NC]
RewriteRule ^(.*)$ http://www.NewDomain.com/$1 [L,R=301]13. You can also do this redirection by installing a plugin into your multisite called ‘Safe Redirect Manager’.
14. That’s all, your migration of WordPress Multisite Subdomain to a Single Site is done.
Moving WordPress Multisite Subdomain in Manual Mode
The manual mode of migration of WordPress Multisite Subdomain involves patience and precision in carrying out the task.
If you miss a step you are going to fall into deep trouble. So it is important that you give thought to each step, read some more manuals from the internet and follow the steps religiously.
In this mode, we are going to migrate not only the contents of posts, pages, comments etc. but also the theme and plugins. So that you could get an almost exact replica of the older site.
When I followed this method of migration, by and large, this method was successful except the few glitches of media related problems. I resolved those issues later on. Hope, it works for you too.
Manual Mode Migration
1. Before you do anything, update the WordPress version of the multisite to the latest version. Now, Log into old site cPanel.
2. Go to File manager > Public_html > wp-content > themes.
3. Look for the themes used for the subdomain.
Readying Themes for Transfer
4. Select the used theme and its child theme, if used.
5. Click right button and select compress.
6. Select Zip Archive option.
7. Click on Compress File(s) button.
8. It will show the Compression Results.
9. Click the Close button and refresh.
10. A file named theme.zip will be shown, where the theme will be the name of your main theme file which was in use.
11. Select the theme.zip file, right click it and download the file on your desktop.
Readying Plugins for Transfer
12. Now go one level up to plugins folder.
13. Select all the plugins in use except the index.php file and right click it to compress like above.
14. Change the name of the compression file to plugins.zip and click on Compress File(s) button.
15. Like above download the plugins.zip file to your desktop.
16. Now again moving one step up go to uploads folder.
17. Select all the folders there and right click to select ‘Compress’.
18. Like above, download the upload.zip file to your desktop.
19. Now go to wp-config.php file and right click it to go to edit mode. Write down the file name of your database which will look like ‘abxcyfd_wp121’. Note down it and close the wp-config.php file.
Readying Database for Transfer
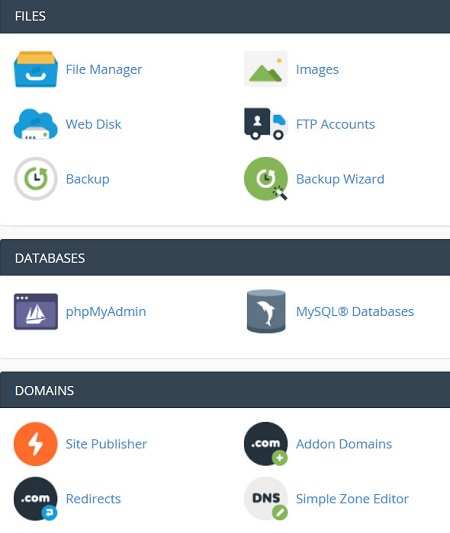
20. Now go to Cpanel > Databases and look for the ‘phpMyAdmin’ database application.
21. Double click ‘phpMyAdmin’.
22. Select the database name ‘abxcyfd_wp121’.
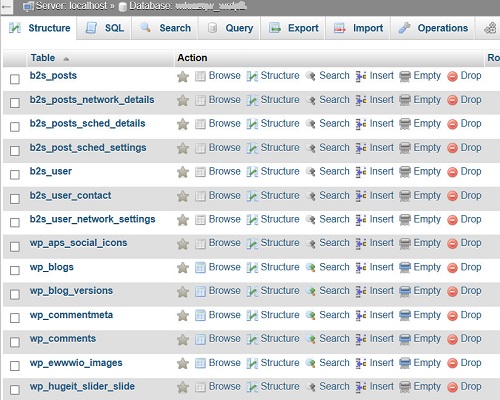
23. On your right panel, complete database table names will be displayed.
24. Click on Export button.
25. Select export method as ‘Quick-display only the minimal options’ and click on Go button.
26. Save the database tables on your desktop.
27. So you will have the following downloaded folders and files on your desktop.
themes.zip
plugins.zip
uploads.zip
abxcyfd_wp121.sqlReadying Contents for Transfer
28. Unzip the themes, plugins and uploads zip files in their folder form so that you have with you the following folders and sql file.
- themes
- plugins
- uploads
- abxcyfd_wp121.sql
29. You need to change now some of the details in your sql database file to make it compliant with the new site. You should edit Site domain name, URL, database name and table prefix with the new site details. Your above folders and files are ready for transfer.
30. Now setup WordPress on your New site.
31. Update WordPress to the same version of your old site.
Transfer of All the Contents
32. Login to cPanel of your new site, Go to Filemanager and navigate to /home/SiteCode/public_html/wp-content.
33. Rename the themes, plugins and uploads folder to themes_old, plugins_old and uploads_old.
Copy above folders namely themes, plugins and uploads from the desktop to this location.
34. Go to your phpMyAdmin panel of news site, from cPanel, expand the database and drop the following tables from the database by going to the ‘Structure’ tab.
- wp_commentmeta
- wp_comments
- wp_links
- wp_options
- wp_postmeta
- wp_posts
- wp_terms
- wp_term_relationships
- wp_term_taxonomy
35. After dropping, import these tables from the sql folder of your desktop and push them at this location.
Note: Don’t drop the wp_usermeta or wp_users tables, unless you’ve chosen to import these tables as well.
36. That’s all, your all relevant files have been migrated now under Manual mode.
Removing Older WordPress Multisite Subdomain
Once you are completely happy that everything’s working as it should be, remove the site from your Multisite installation. I’d recommend leaving this a week or so in case you spot anything that hasn’t moved across.
In the meantime, you can configure the old site’s domain to map to the new one, either by using a plugin or in CPanel. I will suggest ‘Safe Redirect Manager’ plugin for 301 permanent redirections.
Phew! It was a long and slightly complicated process, but you’ve done it.
Hope this article will help you to understand various issues of the migration of WordPress Multisite Subdomain and will help to overcome the problems.
Do ask me, through the comments box, if you face some problem during the said migration.
Do let me know if you have some tips or suggestions about the article which can help us to improve upon the topic in a better way. Please drop your suggestions in this regard in the comment boxes.
If you find this article useful, please share it with your friends on various social media, Facebook and Google Plus funnels.
Thanks.


Comments are closed.